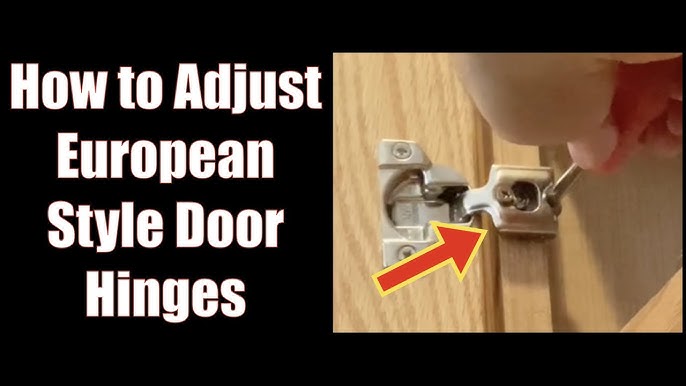
Adjusting European cabinet hinges, often referred to as concealed or “cup” hinges, is a simple process but requires attention to detail to ensure your cabinet doors are properly aligned and function smoothly. European hinges have three main adjustments: side-to-side, up-and-down, and in-and-out. Here’s a step-by-step guide to adjusting them:
Tools Needed:
- Screwdriver (usually a Phillips head) or a drill with a screwdriver bit
- Measuring tape (optional for precise alignment)
Step 1: Understand the Parts of the Hinge
Before making any adjustments, it’s helpful to know the components:
- Cup: This part is mounted on the door.
- Arm: Connects the cup to the mounting plate.
- Mounting Plate: Fixed to the cabinet frame.
- Adjustment Screws: These are the screws that allow you to fine-tune the alignment.
Most European hinges have two or three screws for different adjustments:
- Side-to-Side: Moves the door left or right.
- In-and-Out: Adjusts how close or far the door sits from the cabinet frame.
- Up-and-Down: Adjusts the height of the door.
Step 2: Side-to-Side Adjustment (Align the Gap Between Doors)
If your cabinet doors are misaligned horizontally (either too close together or too far apart), you need to adjust the side-to-side screw.
- Locate the side-to-side screw: This is usually the screw furthest from the hinge plate (on the hinge arm).
- Turn the screw:
- Clockwise: Move the door closer to the hinge side (right if you’re looking at the cabinet).
- Counterclockwise: Move the door away from the hinge side (left if you’re looking at the cabinet).
Tip: Make small adjustments and check the door alignment frequently to avoid over-correcting.
Step 3: In-and-Out Adjustment (Adjust the Door Depth)
If the door is sticking out too much or is recessed too far into the cabinet, you’ll need to adjust the in-and-out screw. This adjusts the depth of the door relative to the cabinet frame.
- Find the in-and-out adjustment screw: This is usually located closer to the cabinet on the hinge arm.
- Turn the screw:
- Clockwise: Pulls the door closer to the cabinet.
- Counterclockwise: Moves the door away from the cabinet.
Tip: Adjust the depth so that the door sits flush with the cabinet frame or adjacent doors.
Step 4: Up-and-Down Adjustment (Adjust Door Height)
If your cabinet doors are not level at the top or bottom, you need to adjust the height. This adjustment is usually made on the mounting plate rather than the hinge arm.
- Loosen the mounting screws: These are the screws that attach the hinge plate to the cabinet frame.
- Slide the door: With the screws loosened, move the door up or down to the desired height.
- Tighten the screws: Once the door is in the correct position, tighten the mounting plate screws to lock the hinge in place.
Tip: It helps to adjust both hinges on the door for a balanced height adjustment.
Step 5: Test the Door
After making your adjustments, open and close the cabinet door several times to ensure it’s properly aligned and functions smoothly. Check for:
- Even gaps between doors and the cabinet frame.
- Smooth opening and closing.
- Proper depth so the door doesn’t sit too far in or out from the cabinet frame.
Common Issues and How to Fix Them:
- Doors Banging Together: Adjust the side-to-side screws to create a small gap between doors.
- Uneven Gaps Between Doors: Adjust the height or side-to-side screws to make the gaps uniform.
- Door Not Closing Properly: Check the in-and-out adjustment and make sure the door isn’t sitting too far out from the cabinet.
Conclusion
Adjusting European cabinet hinges is a straightforward process that can quickly correct misaligned or uneven cabinet doors. With just a screwdriver and a few minutes, you can achieve perfect alignment, ensuring that your cabinets open and close smoothly while looking their best.
This guide provides a simple and effective approach for anyone looking to adjust European-style hinges on their cabinet doors.


