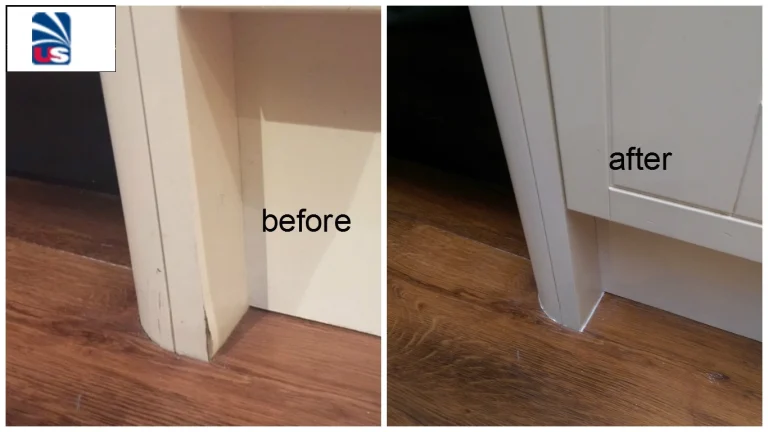
Water damage is one of the most common problems homeowners face with their cabinets, especially in areas like kitchens and bathrooms where moisture is prevalent. If left untreated, water-damaged cabinets can lead to structural issues, mold growth, and costly replacements. Fortunately, with the right tools and techniques, you can repair your water-damaged cabinets and restore their appearance and functionality. Here’s a step-by-step guide to help you get started.
1. Assess the Extent of the Damage
Before beginning repairs, it’s crucial to evaluate how severe the damage is. This will determine whether repairs are possible or if a full replacement is necessary.
Signs of Water Damage:
- Swelling or Warping: Boards that have expanded or warped out of shape.
- Discoloration: Stains or fading, particularly on wood finishes.
- Soft Spots: Areas that feel spongy or weak to the touch.
- Mold or Mildew: Black or green spots indicating fungal growth.
Decision Point:
If the damage is extensive, such as significant structural instability or widespread mold, consider consulting a professional or replacing the cabinet.
2. Remove and Dry the Cabinet
Drying out the cabinet is the first step to prevent further deterioration and create a workable surface for repairs.
Steps to Dry the Cabinet:
- Empty the Cabinet: Remove all items, including shelves, hardware, and contents.
- Ventilate the Area: Open windows or use fans to improve air circulation.
- Use a Dehumidifier: Place a dehumidifier near the cabinet to extract moisture from the air and wood.
- Wipe Excess Water: Use a clean, dry cloth to remove any visible water.
- Allow Time to Dry: Leave the cabinet to air-dry for at least 24-48 hours before proceeding.
3. Sand and Smooth the Damaged Areas
Once the cabinet is dry, sanding helps remove warped or swollen areas and prepares the surface for refinishing.
Steps to Sand the Cabinet:
- Identify Problem Areas: Focus on edges, corners, and spots where the wood has expanded.
- Use Sandpaper: Start with medium-grit (80-120) sandpaper to remove rough patches, then switch to fine-grit (220) for a smooth finish.
- Wipe Away Dust: Use a damp cloth or vacuum to remove sanding dust.
4. Repair the Damage
Depending on the extent of the water damage, you may need to fill cracks, replace sections, or reinforce weakened areas.
Common Repairs:
- Fill Small Cracks or Holes: Use wood filler or putty to fill gaps and imperfections. Apply with a putty knife and let it dry completely.
- Replace Warped Panels: For severely warped or swollen panels, remove the damaged section and replace it with a new piece of wood or MDF.
- Reinforce Weak Areas: Use wood glue or screws to strengthen joints and secure loose parts.
5. Prime and Paint or Stain the Cabinet
Refinishing the cabinet not only restores its appearance but also provides a protective layer against future water damage.
Steps to Refinish the Cabinet:
- Apply Primer: Use a wood primer to seal the surface and ensure even paint or stain application.
- Paint or Stain: Use high-quality, water-resistant paint or wood stain. Apply thin, even coats with a brush or roller, allowing each coat to dry fully before adding another.
- Seal with a Topcoat: Protect the finish with a clear polyurethane or varnish to increase durability and water resistance.
6. Reassemble and Protect the Cabinet
After repairs and refinishing, reassemble your cabinet and take preventive measures to avoid future water damage.
Steps to Reassemble:
- Attach Hardware: Reinstall handles, knobs, and hinges.
- Replace Shelves: Ensure shelves are secure and properly aligned.
- Organize Contents: Return items to the cabinet, avoiding overloading.
Preventive Tips:
- Seal Edges: Apply caulk or waterproof sealant to cabinet edges and seams.
- Fix Leaks Promptly: Repair any plumbing leaks or spills immediately.
- Use Mats or Liners: Place water-resistant mats or liners inside cabinets.
- Control Humidity: Use a dehumidifier in damp areas to reduce moisture levels.
Conclusion
Repairing a water-damaged cabinet is a cost-effective way to restore its functionality and extend its lifespan. By following these steps—from assessing the damage to refinishing and protecting the cabinet—you can save money and maintain the aesthetics of your space. Remember, taking preventive measures is key to avoiding future water damage and keeping your cabinets in excellent condition.


