- (818) 835-5888
- uskitchencabinet@gmail.com
- Free Design
 Skip to content
I’m thrilled to share my experience with no-sand painting for a kitchen cabinet makeover. This DIY project changed my space beautifully without the hassle of sanding. I used General Finishes Milk Paint and a top coat for a pro look in just 4 days, over two weekends.
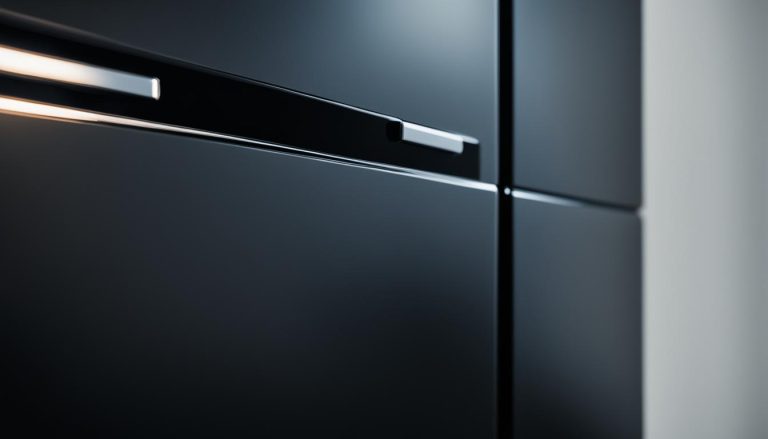
If you are not full skilled, you can also buy black kitchen cabinets from US Kitchen Cabinet online, their black ready to assembled cabinets finished with SHERWIN-WILLIAMS, all plywood construction, solid wood door, absolutely high quality. I got a dealer price, but as I know now even the home-owner place order on their website, you can also get same discounted price as dealers and distributors.
I started by looking into affordable ways to update cabinets. I found that professional refacing costs between $4,300 and $10,100, based on Angi. My DIY method was much cheaper, costing $200 to $600 for materials, compared to professional services which range from $423 to $1,436.
Choosing the right products was key to my success. I picked General Finishes Milk Paint for its great coverage. For my kitchen, I used 3 quarts of Seagull Gray for the perimeter and 2 pints of Driftwood Gray for accents. This paint was efficient, using less product but still giving beautiful results.

The no-sand painting method for kitchen cabinets is becoming popular with DIY fans. It saves time and cuts down on mess, making it a great choice for homeowners. Let’s look into the benefits and things to think about with this method.
Choosing the no-sand method has many perks:
Even though the no-sand method is flexible, sometimes you might need to lightly sand:
Checking your cabinets closely before you start is key. Here’s what to keep in mind:
| Cabinet Condition | Recommended Approach |
|---|---|
| Good condition, smooth surface | No-sanding technique |
| Minor imperfections | Use liquid deglosser |
| Significant damage or glossy finish | Light sanding may be necessary |
To ensure the paint sticks well, clean your cabinets well with a TSP substitute like All Surface Paint Prep. This makes sure the surface is clean for primer and paint to stick, even without sanding.
Getting ready properly is crucial for a top-notch finish. Spend the time to check your cabinets and pick the best method for your situation.

To paint kitchen cabinets black without sanding, you’ll need the right supplies and tools. Here’s a list of what you’ll need for a professional look.
Start with high-quality black paint for cabinets, like the Rust-Oleum Transformations Kit. It’s often on sale for $50 and covers about 100 square feet. Don’t forget to add $25 for wood knobs or $40 for brass ones.
Here’s what you’ll need for the job:
| Category | Items |
|---|---|
| Cleaning Supplies | Krud Kutter, microfiber sponges, grease-cutting soap |
| Painting Tools | Angled brushes, small rollers, paint trays |
| Protection | Drop cloths, painter’s tape, blue tape for labeling |
| Paint Products | Bonding primer, cabinet-specific paint (satin or semi-gloss finish) |
For the best results, use cabinet-specific paints from trusted brands. ECOS Paints interior air-purifying varnish or Sherwin-Williams Zero-VOC Harmony paint are great for eco-friendly projects.
Wait 24 hours after painting before using your kitchen fully. Avoid cleaners for 7 days for the best finish. With these supplies and patience, you can update your kitchen for about $115. That’s much cheaper than new cabinets.
Before you start painting your kitchen cabinets black, make sure you prepare well. This step is crucial for a smooth project. Let’s look at the key steps: kitchen prep, disassembling cabinets, and setting up your workspace.
Begin by emptying your cabinets and taking out all doors, drawers, and hardware. Mark each piece so you can put it back correctly later. This step of disassembling is vital for a professional finish.
Wrap countertops, appliances, and floors with drop cloths or plastic. This keeps paint splatters away and makes cleaning up easier. Good prep work now saves you trouble later.
Make a well-ventilated area with good lighting for painting. This lets you spot drips or uneven spots. Use painter’s pyramids to lift cabinet doors and drawers for painting all sides.
| Task | Time Estimate | Importance |
|---|---|---|
| Cabinet Disassembly | 2-3 hours | High |
| Surface Protection | 1-2 hours | Medium |
| Workspace Setup | 1 hour | High |
Spending time on proper prep sets you up for a great cabinet painting project. Painting cabinets yourself can save you a lot of money. With the right kitchen prep, disassembly, and workspace setup, you’re on your way to stunning black shaker cabinets without spending too much.
I’ve found a quick and easy way to transform cabinets without sanding. This method cuts down on time and mess, ideal for DIY lovers. Let’s explore how to paint your cabinets black without the need for sanding.
Start by cleaning your cabinets well. This step is key for the paint to stick. Use a degreaser to clear off any grease, then wait for everything to dry. After that, apply a liquid deglosser – a great alternative to sanding that gets the surface ready for paint.
After the deglosser dries, it’s time for primer. Pick a bonding primer made just for cabinets. This primer is crucial for the paint to stick well, especially if you’re not sanding. Spread it out smoothly with a good brush or foam roller.
Painting is the fun part! Go for a semi-gloss or satin finish trim and cabinet enamel for the best look. Paint in thin layers, letting each layer dry before adding more. For a big change to black, you might need two coats, or even more.
This no-sand painting method is a hit with cabinet renovators. It’s quicker than traditional ways and doesn’t make a mess in your kitchen. Just remember to label your cabinet doors before taking them off to make sure they go back on right.
When painting kitchen cabinets black without sanding, getting the surface ready is crucial. I’ll show you how to degrease and clean cabinets for a smooth, lasting finish.
Choosing the right cleaners is key. I like using Pine Sol and Mean Green for tough grease. For heavy grime, Tri-sodium phosphate (TSP) works well. Always wear gloves and ventilate when using strong cleaners.
Begin by removing all hardware from your cabinets. Then, clean with your chosen product and a microfiber cloth or sponge. Focus on areas near the stove where grease builds up. For tough spots, a magic eraser works well. Rinse with clean water to remove all residue. This careful cleaning is vital for the paint to stick well.
Let the cabinets dry completely, which takes about 24 hours. After drying, check the surfaces for any dirt, grease, or damage. Fix these problems before priming and painting. A clean, dry surface is key for a professional look on your RTA black shaker cabinets.
| Cleaning Product | Best For | Drying Time |
|---|---|---|
| Pine Sol | General Cleaning | 2-3 hours |
| Mean Green | Degreasing | 3-4 hours |
| TSP | Heavy Buildup | 4-6 hours |
I’m excited to share my tips for applying cabinet primer and paint for a durable finish. This step is key to making your kitchen look stunning with black paint.
First, I use a 2.5-inch angled brush for applying a bonding primer. For flat surfaces, a small roller works best. It’s important to work with the wood grain for a smooth base.
After the primer dries for about two hours, I lightly sand with 180 or 220 grit sandpaper. This prepares the surface for painting.
For the paint, I choose high-quality cabinet paint in satin or semi-gloss finish. General Finishes Milk Paint is a great choice for coverage. It’s important to apply thin coats and let each coat dry before adding more.
Most projects need 2-3 coats for the best look. This ensures even coverage.
To protect your work, consider adding three thin coats of a high-performance top coat. This step adds a professional touch and makes the finish more durable.
| Step | Product | Application Method | Drying Time |
|---|---|---|---|
| Priming | Bonding Primer | Angled Brush / Small Roller | 2 Hours |
| Painting | Cabinet Paint (Satin/Semi-Gloss) | Brush / Roller | 2-4 Hours Between Coats |
| Top Coat | High-Performance Sealant | Brush / Sprayer | 24 Hours Full Cure |
Remember, patience is key. Let your cabinets dry completely between coats and after the final coat. This ensures a professional-looking, long-lasting finish that will transform your kitchen.
I’ve shown you how to paint kitchen cabinets black without sanding. This DIY makeover can change your kitchen’s look. It’s a popular choice, with Pinterest showing 4,674 shares of similar projects.
Getting ready is crucial. Clean your cabinets well with degreasers like Krud Kutter or white vinegar. Then, apply deglosser, use oil-based primer, and paint with latex paint. This whole process takes about 3 to 4 days but looks professional.
Black cabinets look amazing and are popular, along with green, red, and blue. To keep them looking good, use door bumpers and clean up spills fast. With care and patience, you can make your kitchen look amazing without spending a lot.
The no-sand method saves time and reduces mess. It’s great for cabinets in good shape with smooth surfaces. It gives your kitchen a fresh look without the hard work of sanding.
Sanding is needed if your cabinets have peeling paint, deep scratches, or very glossy finishes. Cabinets made of laminate or those with big damage also need sanding for better paint adhesion.
You’ll need angled brushes, bonding primer, cleaning supplies, deglosser, drop cloths, grease-cutting soap, high-quality cabinet paint, microfiber sponges, paint trays, painter’s tape, and small rollers. Look for cabinet-specific paints from brands like Benjamin Moore, Behr, or Sherwin-Williams for the best results.
Clear countertops and cabinets, remove and label doors, drawers, and hardware for easy reassembly. Protect surfaces and appliances with drop cloths. Set up a well-ventilated workspace with good lighting.
Apply liquid deglosser to cabinet surfaces, then use a bonding primer made for cabinets. Paint cabinets with smooth strokes using a high-quality brush or foam roller. Apply two to three coats, letting each dry before adding the next. Think about updating hardware to match the new black finish.
Use a grease-cutting soap or vinegar-water mix, focusing on high-grease areas near the stove. For tough buildup, try a degreaser like Krud Kutter or TSP. Always ensure good ventilation and wear gloves when using strong cleaners.
Apply bonding primer with a 2.5-inch angled brush or small roller, following the wood grain. Use high-quality cabinet paint in satin or semi-gloss finish. Apply thin coats, letting each dry before adding the next. Consider using General Finishes Milk Paint for great coverage. Finish with three thin coats of a high-performance top coat for extra durability.


